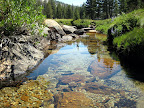
My friend Rob found an interesting summer job doing gardening and maintenance stuff at Yosemite Valley. Three months in Yosemite seems like a great way to spend some time before moving on to law school. I finally got to visit Rob and do a little bit of backpacking with him in the Yosemite High Country.
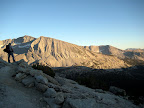
We started at Tuolumne Meadows and climbed up to Volgesang. Our original plan was to make it all the way to Lake Merced and then down to the valley the next day but I found the high altitude pretty tough to adjust to and the going was a bit slow. Instead, we crossed over Volgesang Pass into the valley below and camped there. Still, about 20 miles total in a challenging but absolutely beautiful part of the park!
As it turned out, a forest fire started in western Yosemite the next day and covered the valley in a smoky haze. The air quality was poor and it felt like sunset two hours early. As such, it was probably for the best that we didn't continue with our original route. According to the newspaper, the fire was apparently started in a target shooting accident.
The High Country is really interesting. In parts, the trees are quite dense but the terrain is covered in large boulders from rock slides and various river movements. The forest then gives way to a very noticeable tree line, followed by jagged peaks that look like castle ramparts. In other parts, the peaks hide green meadows with crystal-clear creeks or small lakes.
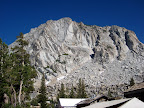
There are several High Sierra camps (like the Volgesang camp) scattered in the area. Folks pay something like $150 per night for the convenience of sleeping in a tent cabin with meals provided. They then have less gear to carry. For us, the camps were a helpful source of drinking water.
There were quite a few serious hikers on the trail, including an older gentlemen who was essentially hiking the entire High Country alone for over a week, armed with a wooden walking stick with bells to scare off bears.
Sunday, July 27, 2008
Wednesday, July 23, 2008
draft-802.11s in Linux 2.6.26
The 2.6.26 kernel was released a couple of weeks ago. One of the most exciting changes (for me) was the mainline acceptance of draft-802.11s mesh networking into the mac80211 stack (it's even listed under "cool stuff" at Kernel Newbies). I was also quite happy to see mesh enabled in the kernel configuration for Ubuntu's upcoming 8.10 release.
hardware support
The mesh stack works with off-the-shelf "softmac" chipsets supported by mac80211. In 2.6.26, that includes most Zydas USB chipsets (supported by the zd1211rw driver). Broadcom chipsets supported by the b43 driver work in the wireless-testing kernel (the patch didn't make it in time for 2.6.26) but it looks like distributions like Ubuntu are providing patched drivers and b43 should support mesh in their next kernel (ie: for the 8.10 release). I submitted a patch for the ath5k driver recently. We will hopefully have a wider range of usable WiFi hardware to mesh with in the near future.
try it out!
Right now you can try draft-802.11s mesh on your Linux system by either installing a current wireless-testing kernel or by fetching and installing a compat-wireless snapshot of it. You can also presumably test by using the Ubuntu 8.10 alpha release (or another distribution where draft-802.11s mesh is enabled in the kernel configuration). The o11s HOWTO takes you through the kernel compile (if you go that route) as well as creating a Mesh Point interface using iw. Please note that you should not have userspace like NetworkManager running when playing with the mesh.
Hopefully there will be more contributors as more people start to experiment with the mesh stack. For those interested, there are suggested minor as well as more involved improvements.
draft-802.11s and OLPC XO-1
Also perhaps worth mentioning: the mac80211 mesh is not inter-operable with OLPC's mesh at this time. This is because OLPC's implementation is based on an earlier version of the draft (and it includes various other modifications). The open80211s mesh, on the other hand, is a reference implementation that tracks the 802.11s draft as closely as possible.
Sunday, July 20, 2008
fun with old radios
My '73 3.0S is currently not running due to an increasingly wacky project that I am undertaking, so I am planning to drive my dad's '74 3.0CS up to Mt. Rainier in Washington state for my next road trip and Senior Six car rally. The guy that I bought that car from had discarded the original radio and related parts and installed a pretty cheesy CD player which finally stopped working. Before I take this trip, I'd like to make sure that there's working music and I decided to use this as an opportunity to put a proper radio back into the car for my dad.
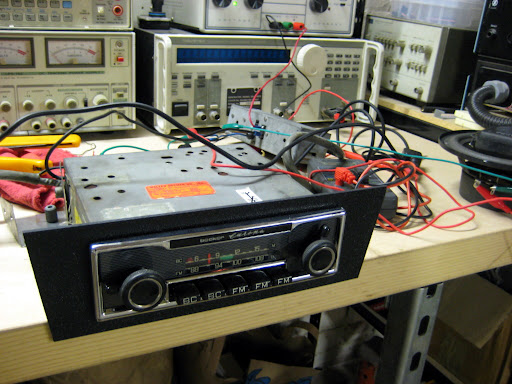
Those cars could be ordered with a few different radios, and the Becker models are my favorite. On the non-AC cars, the radio just sits beneath the center console vents in a simple plastic panel. I found a beautiful Becker Europa Stereo on eBay and my friend Aron helped me fabricate a panel out of ABS. The result is quite nice!
One of the most interesting things about Becker radios is that they have a special auxiliary input connector on the back. I'm not sure what this was intended for originally (I've heard "traffic monitors") but it makes for a perfect interface to modern equipment, like an iPod.
For $47.96, Becker will sell you a cable that plugs into this connector and terminates into a stereo jack. Plug anything into that jack, and the radio is overridden. I took a speaker out of the car, wired up the radio, amplifier, and iPod on my work bench, and fired them up. The iPod plays through the Europa and everything sounds great!
At this point, I just need to finish up the wiring, replace a broken automatic antenna, and button the center console back up. I'm also going to add a USB "charger" circuit in the car's glove box or under the radio so that the car can charge things like iPods and mobile phones on long trips. This is simply a 5V switching regulator (with spike suppression and some filtering) that will power a USB type-A female connector.
In the mean time, I've obtained a Becker Grand Prix radio for my 3.0S, a close match to what the car originally had. Since I am converting from an AC to a non-AC center console, I'll need to also make a plastic panel and bracket for that car.
Subscribe to:
Posts (Atom)